Welcome to Scrappin Outloud

Thanks for dropping by! Take a look around and stay awhile. See that little purple box on your left, it contains a summary of recent posts, further down, you will see a box of shared items, these are things I find around the web and want to share with you. Further down on the left you can add a link to your own blog for others to see. I love comments, so feel free to leave some love and thanks for stopping by.

Sunday, October 18, 2009

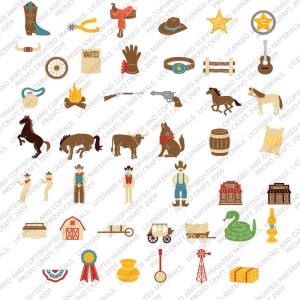
New Cricut Cartridge Sneak Peak: Old West

Old West

Old West Cartridge Sneak Peak, no release date info available...


Free Jack-o-Lantern carving templates

I don't know about you, but I always struggle when its time to carve pumpkins. They never come out right and my kids have such great expectations! Check out these printables from about.com and get your carving off to a great start this year!

Select a pumpkin that is ripe, has no bruises, cuts or nicks. Do not carry a pumpkin by its stem; it may break, and do not bruise it as it will not last as long. For easy cleanup, place your pumpkin on several layers of newspaper before carving. Kids: have a parent or other adult cut a circle around the stem of the pumpkin for you. They should use a sharp knife with long, sturdy blade for best and safest results. Or, you can do it yourself with a safer, plastic "pumpkin carving" knife available at many supermarkets during the pumpkin season. Parents: knives are very sharp, so make sure that the proper supervision is maintained when the children carve their pumpkins.

Make sure the hole is large enough to reach in and pull out the seeds and stringy membrane. The bottom of the pumpkin could also be cut off instead, this will allow the pumpkin to sit up straight and make removing the seeds easier! When cleaning out the pumpkin, use an old soup ladle to get out the seeds. Try carving a giant pumpkin, it is easier to carve than a regular pumpkin.

Examine your pumpkin to determine the best place to carve his or her face. Draw an outline of a face on a plain sheet of white paper (use simple bold features), or print one of our handy Jack O'Lantern templates (Below on this page - click on any of the images to go to the full-sized print-ready template). Tape your paper to the pumpkin where you want the face to be. Score the design onto the pumpkin by punching through the paper into the pumpkin with a large nail or pin.

Carefully cut out the design following the holes that were "punched" with your plastic knife. When you are finished cutting, simply push out the pieces to view the final results. Now you're all set to light up your home on Halloween night! Have Fun!

Template 1 Template 2 Template 3 Template 4
Template 5 Template 6 Template 7 Template 8


Freebie Halloween SVG


Love this one Wanda created!

Featured Project: : Twick or Tweet Favor

Twick or Tweet Favor Twick or Tweet? "Tweet" is our answer, without a doubt! Our cute little bird (incognito, of course) is ready to delight your friends and neighbors with his bucket of treats this Halloween.


Today's Video; Create Clear stamps with your cricut

One of my favs, Christmas with Cricut created this great video, enjoy!


Another Thanksgiving Freebie


Here is another Thanksgiving Freebie, from Free SVGs, they really are cranking them out arent they!


Santa Book - The perfect Holiday organizer


Join me for this fantastic Holiday journey filled with plenty of templates and lists to help you organize your holiday season while scrapbooking the entire thing in Santa's Book. That's 8 fun-filled weeks that will keep you on track for decorating, cooking, shopping and crafting your holidays! I have made these books each year of the past 5 years and have i mproved on the books each year, now I am ready to share with you!


Hurry and sign up, the fun starts Nov 1!


Posted by Picasa

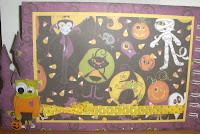
Halloween Shape Book

Check out this awesome book made by fellow scrapper, Debbie


I think I should put journaling lines here since the space is too small for pix. I've redesigned this so that these pages are larger.
These pages I left blank because I love the paper.
I added the moon with pop dots. It was a piece that I cut off of another piece of paper from the same pack.

I wish I had done more embossing. I just forgot!

Love this layout. Bugjunkies idea. I used a cuttlebug embossing folder to make the fence and boards look like wood, along with the Cricut markers and smugged ink.

Wasn't so excited about the paper I had on this page. Therefore I added one big background for a pic or pix and the cute little guy from the coordinating stickers.


Love this page with the black cat and spider to go with the witch. I had to make a mad dash to Michaels last night to get the white pen to finish the spider and cat and get smaller googlie eyes.
These are the last 2 pages. I used my MS punch for the "Boo". I also used Shimmerz on the moon to make it kinda glow but not covered with Stickles because I wanted the spider web to show through. Hope you can see it.


Top ten reasons to send a handmade card!

by Elaine Wilson

1. They’re guaranteed to bring a smile to the face of the recipient. If you use a clear envelope, it will bring a smile to the face of every person who sees it along it’s merry way!

2. In this e-mail and information age, we’ve lost sight of how fun it is to receive “snail” mail instead of just bills. Let’s make it FUN to go to the mailbox again!

3. Everybody likes to receive something personalized instead of mass-made. It makes them feel special! Think about the last note YOU received.

4. A stamped card or gift wrap adds an extra pizzazz to a gift card or small token. Turn a small gift into something special.

5. It takes a little time to create something handmade, and the recipient can feel that extra unique touch. No one else creates quite like you!

6. Handmade cards are often kept long after the store-bought ones are tossed!

7. You’ll never be at a loss for an occasion—there’s always somebody getting married, having a baby, graduating, retiring, moving, or having a birthday.

8. Handmade cards can be recycled. Just cut off the fronts and adhere to a new card. You’ll never see anyone do that with a store card.

9. Handmade cards can cost up to four dollars LESS than store-bought ones. WOW!

10. If you think hard enough, you’ll come up with a least one person you really ought to send a thank-you. Your mother would be proud!


Free SVG: Girls night out


Scanning Your Photos For A Digital Scrapbook

Pete Fontaine --

Traditional scrapbooking may soon be taken over by its digital cousin. The digital scrapbook craze has made huge headway into the world of scrapping. Because all digital scrapbookers posses the necessary computer skills to enjoy their hobby, it means that they can avail themselves to vast online resources. Free and low cost tools, creation software, and video tutorials are everywhere. If you need tailor made advice, technical assistance, or friendly community you’ll find it easily.

Don’t limit yourself to just using just your digital photos. All of your old photos can be sent to a low cost scanning service to be digitized. For as little as a nickel apiece you can add hundreds of your favorite memories to your scrapbook.

Perhaps an even greater benefit of scanning your photos than making them available for your digital scrapbook is protecting them from possible destruction or damage. When a scanning service saves your photos to a DVD it makes it possible to store a duplicate in two or three different locations. This insures their permanent survival, protecting your photographs from natural deterioration and damage from mold and moisture. Scanning to a DVD also allows you to share a set of your pictures with others.

If you’ve ever wanted to build a photobook or upload your photos to a photo sharing site then you’ll have an additional benefit to scanning photos for your scrapbook. Want to build a slideshow to view on TV? You can do it online or buy inexpensive software. You can even add your own music. Want to create a T-shirt with a crazy photo on it? Just search “photo t-shirt”. It’s that easy!

Make sure your photo scanning service will scan at 300 dpi. No more, no less. 300 DPI is the best choice for almost all photo scanning purposes, so don’t pay for more. Also make sure that your photos are saved as a high quality jpeg. You will be using jpeg files in your scrapbooking efforts, and though high quality jpegs have bigger files, you can always use your photo editing software to reduce the file size for a copy of the original.

Find a photo scanner who offers an inexpensive photo enhancement service. These services can make descent improvements to most of your photos. Don’t pay a lot for this because it won’t perform miracles, and it won’t fix all of the problems. But beware; always enhance a copy of your original scans. Don’t let a photo scanner send just the enhanced scans. Photo enhancement as well as any manipulation or rotation of your scans means they will be recompressed. Repeated recompression means loss of image quality.

A quick search for “digital scrapbooking” will give you immediate access to educational e-books, organizational software, online classes, templates, toys, and tools. The raw materials of scrapping are your photo scans. So find a low cost scanning service and get started!

Scanning photos for digital scrapbooking has the added benefit of permanently protecting them from destruction and deterioration. Photo Scanning makes it easy and inexpensive to share a complete copy of your family’s precious photographs with each family member. Find out more about photo scanning at Pete’s website www.nickelscan.com


Use Scrapbooking Techniques for Your Home Business Portfolio

October 18, 2009 by Mary Emma Allen

Leave a Comment

Generally we think of making scrapbooks to hold family memories and photos. We even teach classes to help others develop various types of scrapbooks.
Image: sxc.hu

Image: sxc.hu

However, you can utilize scrapbooking techniques for business portfolios. Also, you can assemble these “portfolios” online, or scan into your computer, for viewing online (at your blog or web site) by potential customers. I’ve used these techniques for two of my home businesses.

I transformed a photograph album type of scrapbook into a portfolio when I had a quiltmaking/patchwork business. In it I placed photos and descriptions of items I had for sale or could make on order. I also included a history of my quiltmaking, with photos of craft shows and displays.

This was before the current scrapbooking era, so I didn’t have many scrapbooking supplies available to accessorize the pages. However, album was successful in showcasing my work.

Currently I’m compiling a Party Planning scrapbook portfolio for my virtual party planning venture. This gives pictures of parties planned, ideas for parties, and resources where the customer and I can find the supplies needed. This portfolio is in conjunction with my party planning blog.

By utilizing scrapbooking techniques, I find the portfolio is more attractive and eye-catching. It also gives an idea of my creativity.

Have you ever thought of using your scrapbooking/collaging talents in this way to promote your home business?


Stop personalizing other’s mistakes

by Julie Cohen on Oct 14, 2009
I was talking to a friend recently about how she personalizes other people’s innocent mistakes. She says even though she knows it’s irrational she can’t seem to help herself. She explained that a few days back a friend had invited her over for dinner. That dinner was to take place yesterday. When she did not hear from her friend by the late afternoon, it became clear that her friend had forgotten. Even though she knew her friend has a very chaotic life right now and that is wasn’t personal she was consumed with negative self talk. She ruminated on thought such as, “she doesn’t like me and why would she” and “what did I do wrong?” Even though she didn’t do anything wrong she was consumed with guilt.

I think many of us have experienced similar situations. Our irrational thoughts wreak havoc with our self-esteem. We do this often out of habit. I think most of our irrational thoughts have been around for a long time, maybe even since childhood. They rear their ugly heads whenever given the opportunity such as when we feel rejected.

Irrational thoughts reside in our unconscious. You can identify an irrational thought when you find yourself saying, “I don’t know why I feel this way.” “I don’t know” is a very important clue and marker to the unconscious. If you find yourself saying that, then it may be you are operating from a very old script that may feel familiar but is no longer applicable to your current life. In fact, allowing those irrational unconscious thoughts to have free reign impedes you from living a fulfilling happy life.

When you find yourself immersed in negative self talk stop the thoughts for a minute. Be an observer of your own thoughts and feelings. Instead of answering the question why do I feel this way or what is wrong with me, ask yourself are these thoughts helping me in any way. If the answer is no (which is usually the case) you have just created an opportunity to operate in the rational. When you operate from a rational place negative self talk will disappear along with guilt and shame. Creating new habits takes time and practice. But, to lead a fulfilling life free of negative self talk it’s imperative to not personalize other people’s mistakes.


Cricut Top 40